
Getting Started
Download and install Munk AI, configure AI, optionally enable Munk Test, then enter a project and run your first work item.
Follow this path from download to first real work. Munk AI currently supports macOS on Apple silicon (M-series); Android Mobile Host is available for sideload.
1. Download and install
Download the macOS app (and optionally the Android Mobile Host) from the website Install page.
After install, open Munk AI and sign in.
2. Configure AI
Open Settings → AI and set your OpenAI-compatible provider:
- Base URL (for example OpenRouter)
- API key (your own model credentials; the key is never shown again after save)
- Default model (refresh the list, or type a custom model id)
- Click Save
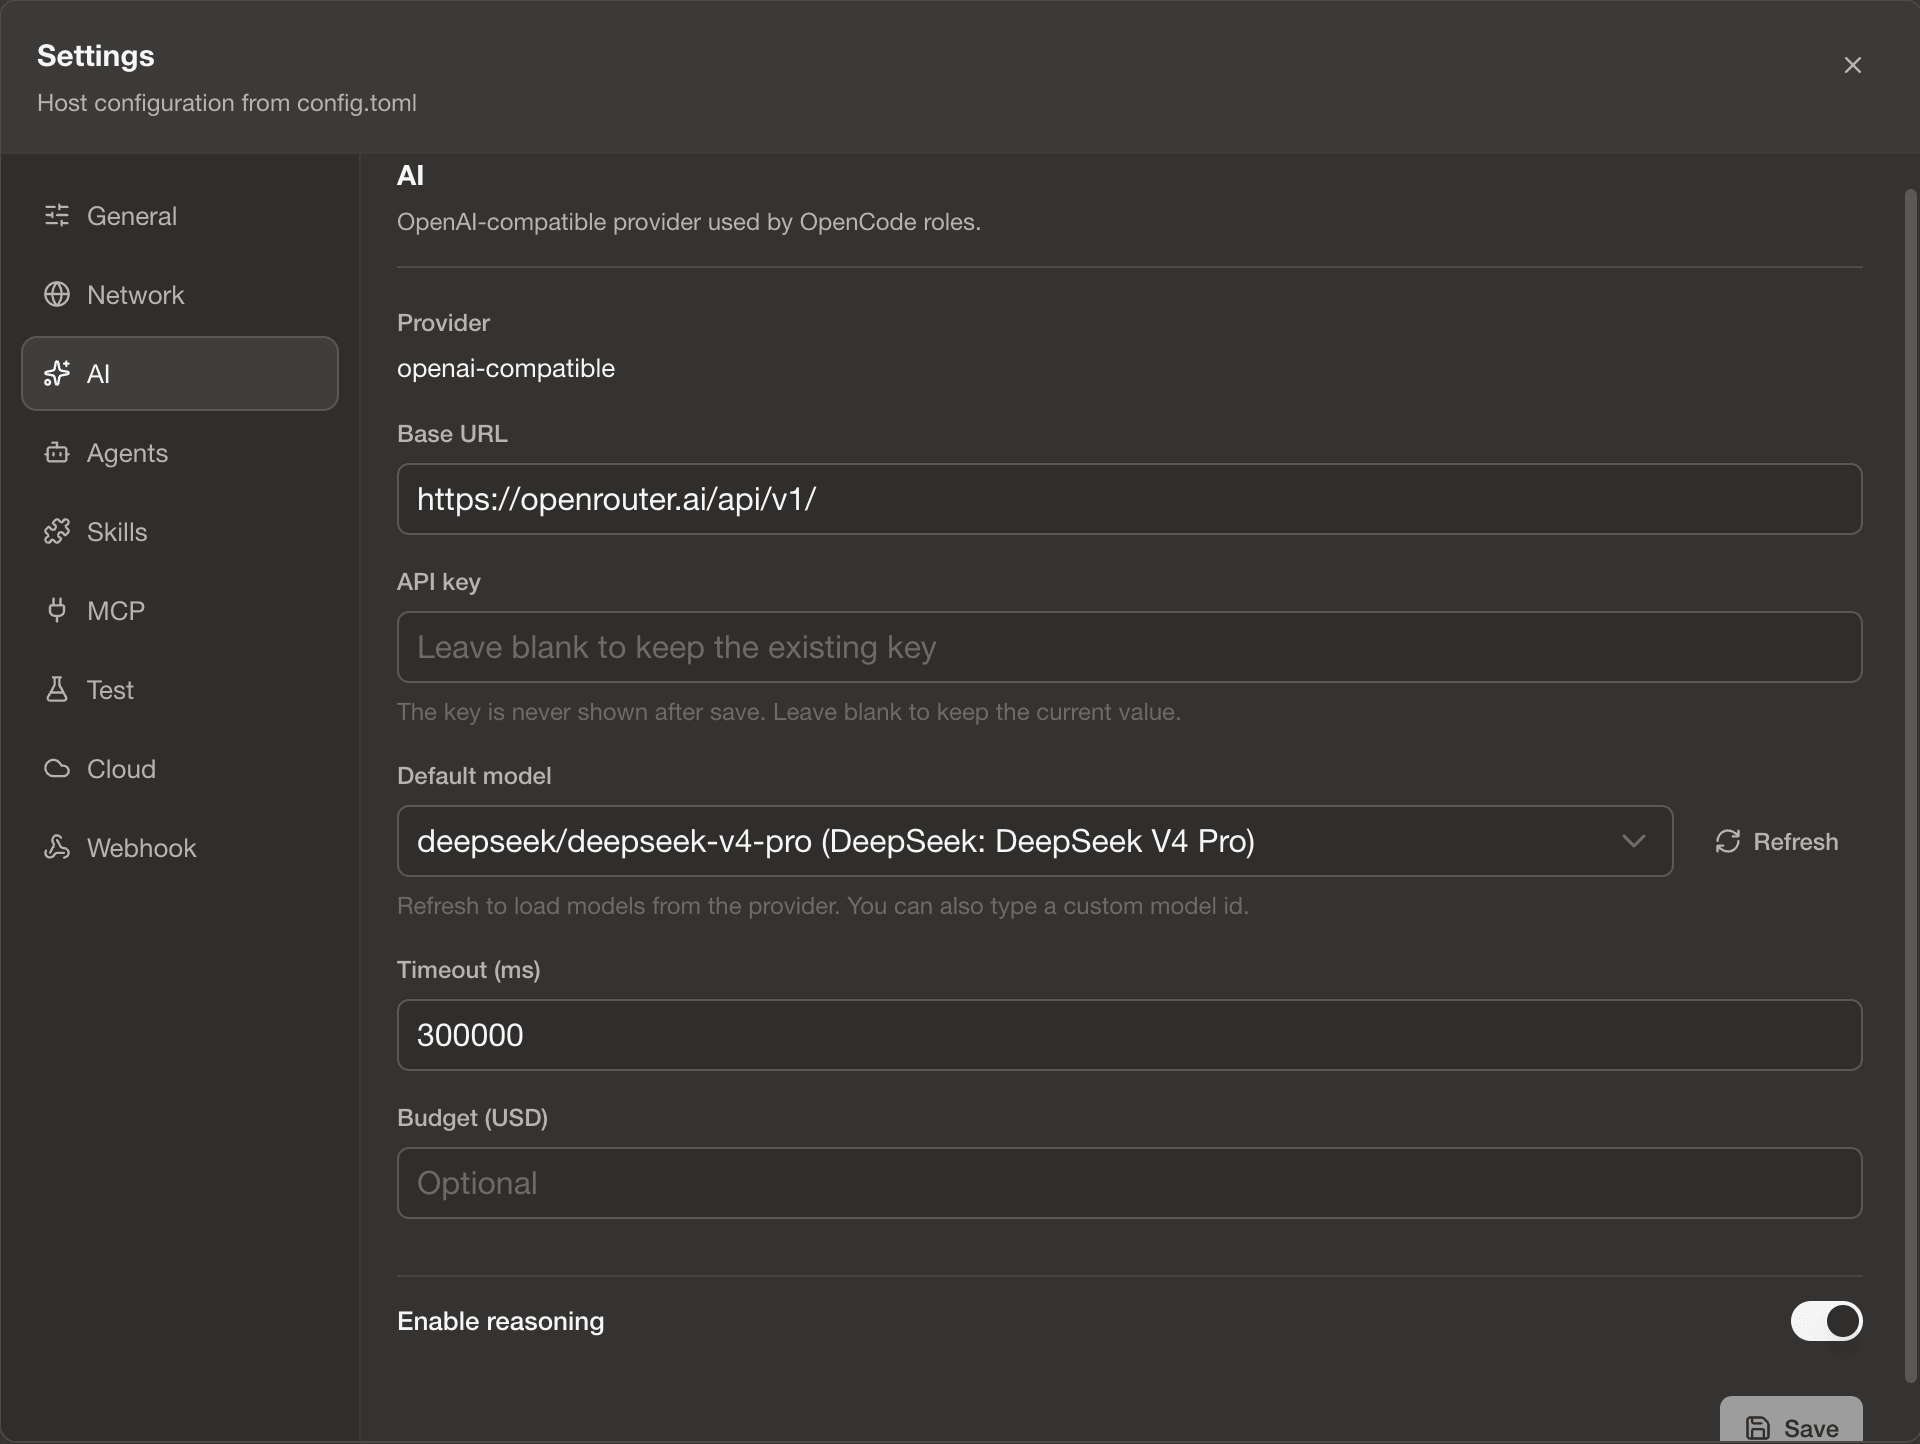
Configure MCP, Skills, webhooks, and the rest later as needed. For account and repos, see Account and GitHub.
3. Optional: enable Munk Test (UI verification)
Do this only if you want AI to run device / UI verification (Deploy → Verify) inside the loop. You can code and run gates without it.
- Install and configure Test with Munk Test Getting Started (including the Test Agent API key)
- Back in Munk AI, open Settings → Test
- Confirm a resolved
munkbinary (usually leave blank for auto-resolve) - Click Connection test until serve is reachable and Verify is ready
- Then turn on Enable UI Verify
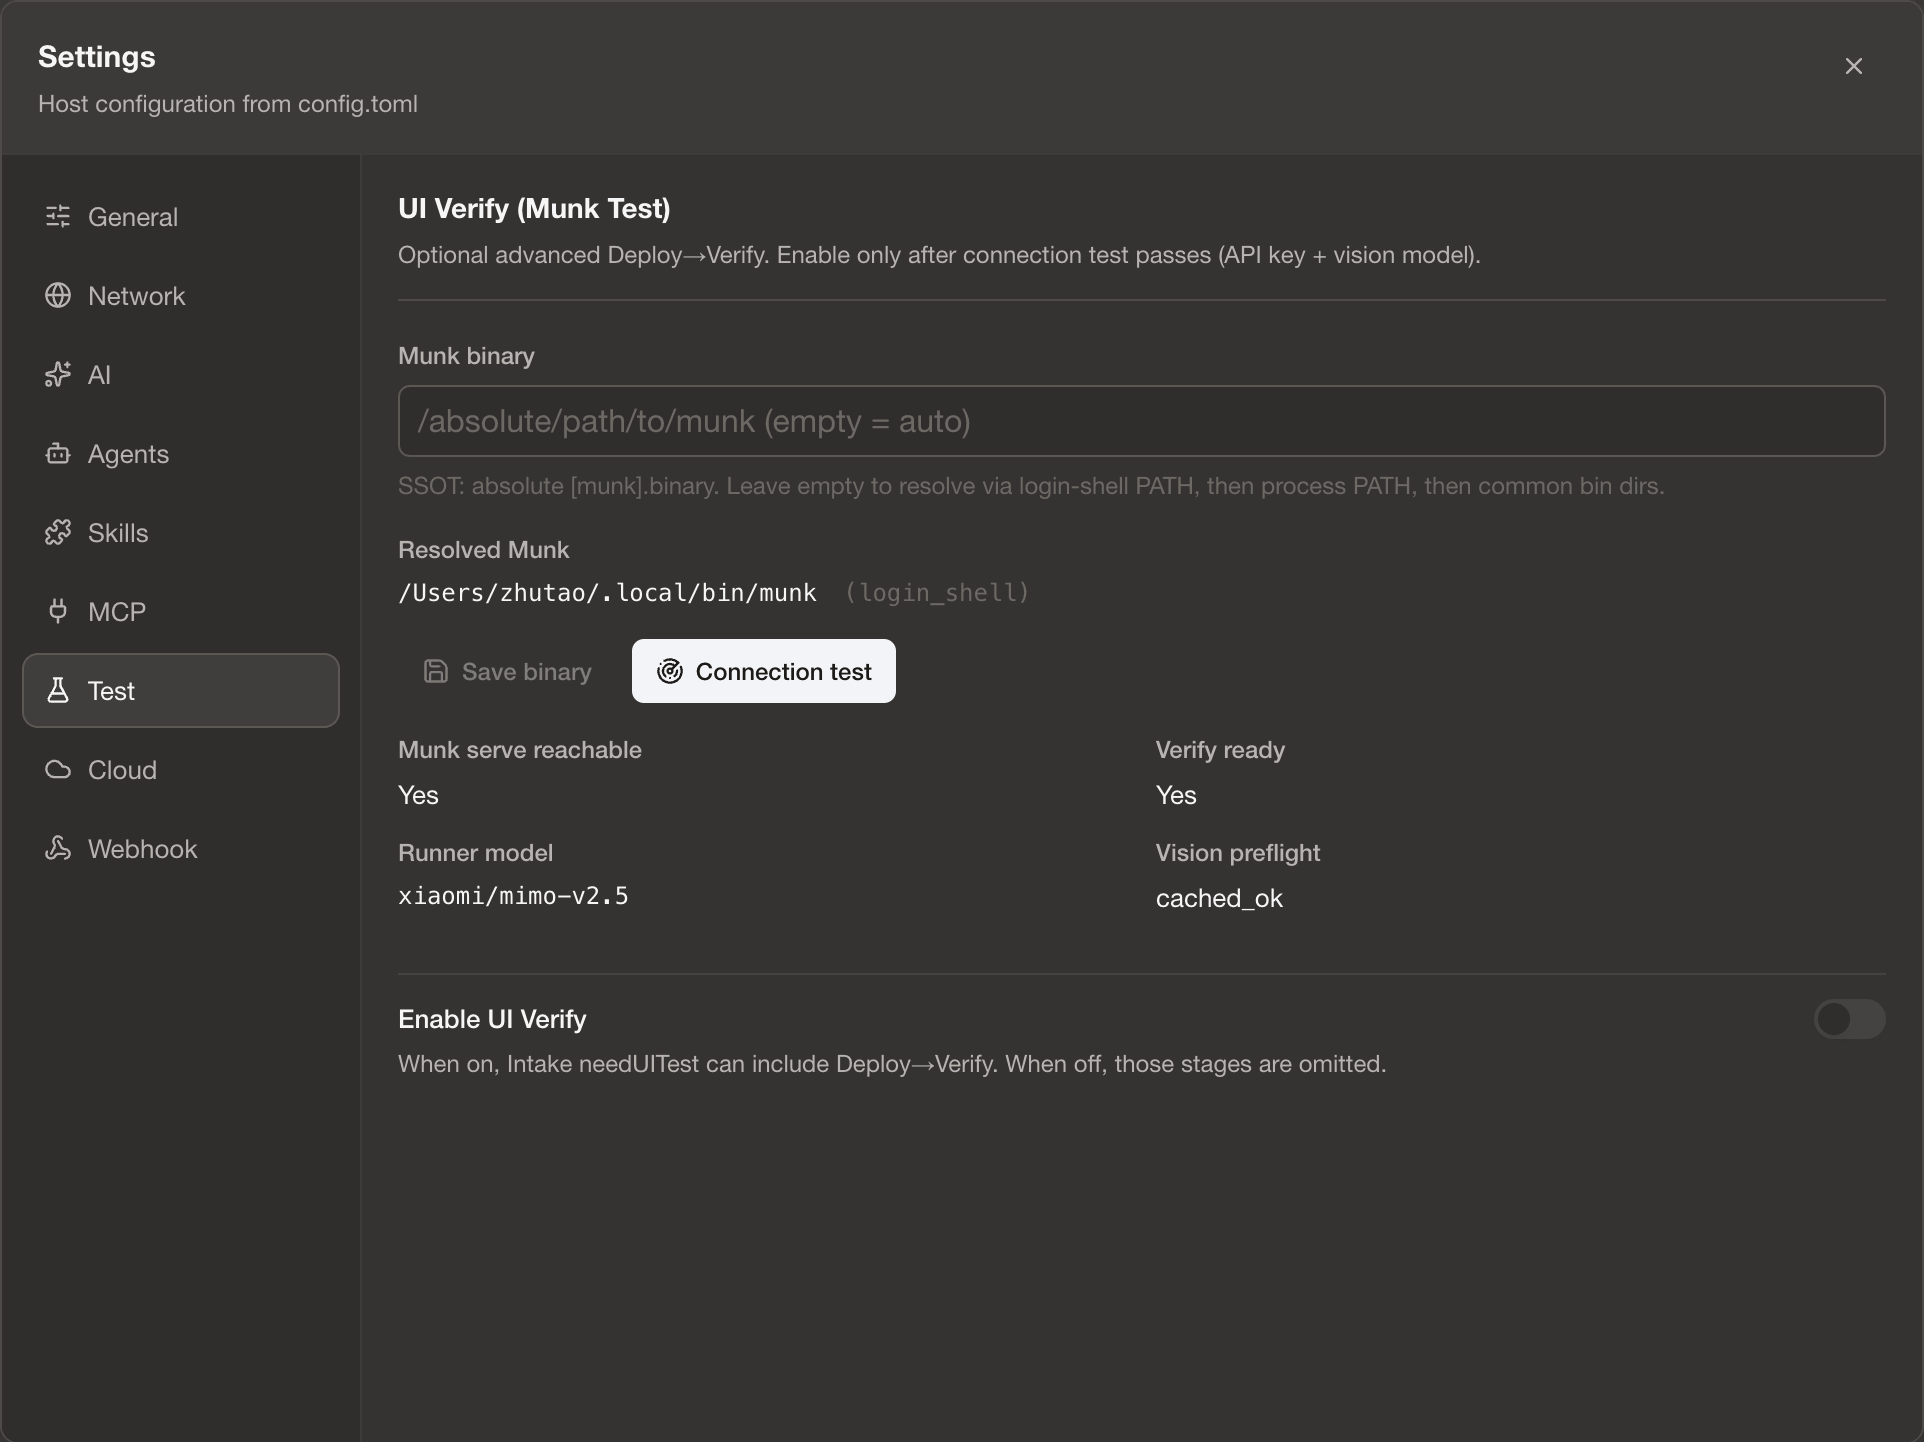
See Relationship with Munk Test for the product split.
4. Home: how you enter a project
After launch, Home offers four entry points:
| Entry | When to use it |
|---|---|
| New project | Start a local project from scratch (ready-to-use coding environment) |
| Open local | Point at an existing folder as a Codebase |
| Clone public | Clone a public repository locally |
| GitHub App | Clone or link a repo from your authorized GitHub App list |
The Recent list jumps back into projects you used lately.
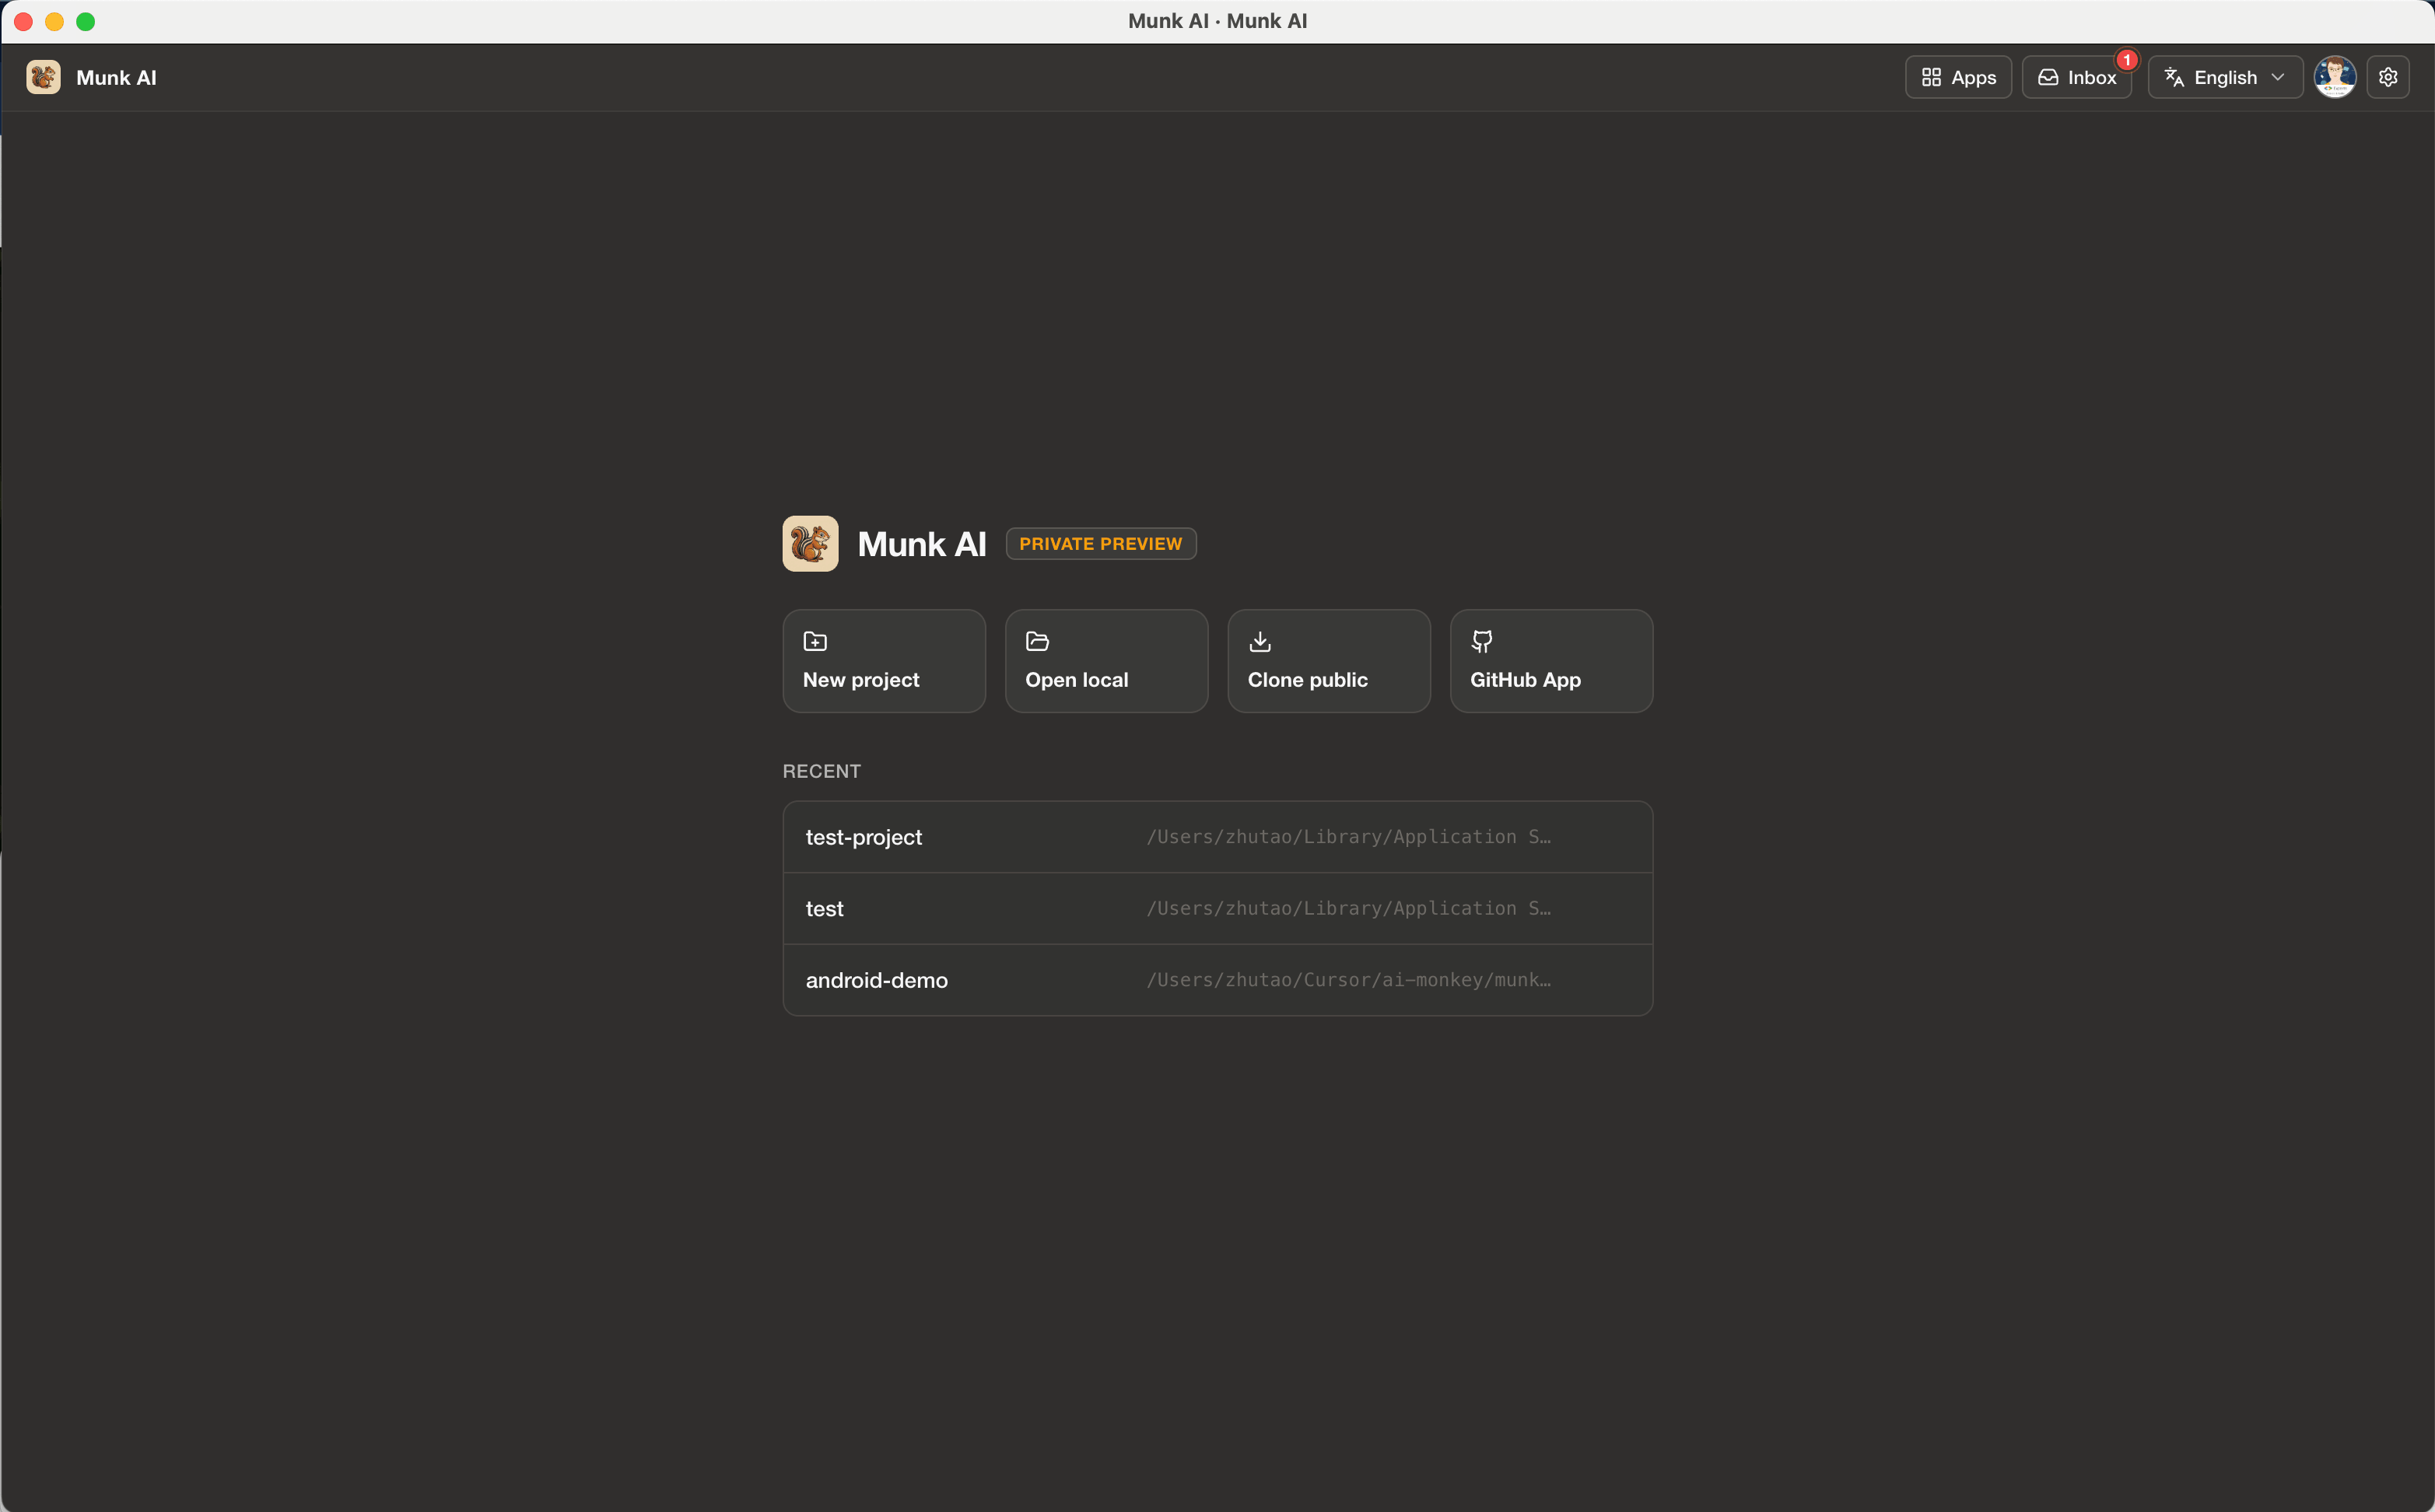
For GitHub authorization and binding details, see Account and GitHub.
5. Workbench: the main surface at a glance
Once you open a project, you land in the Workbench — where you spend most of the day:
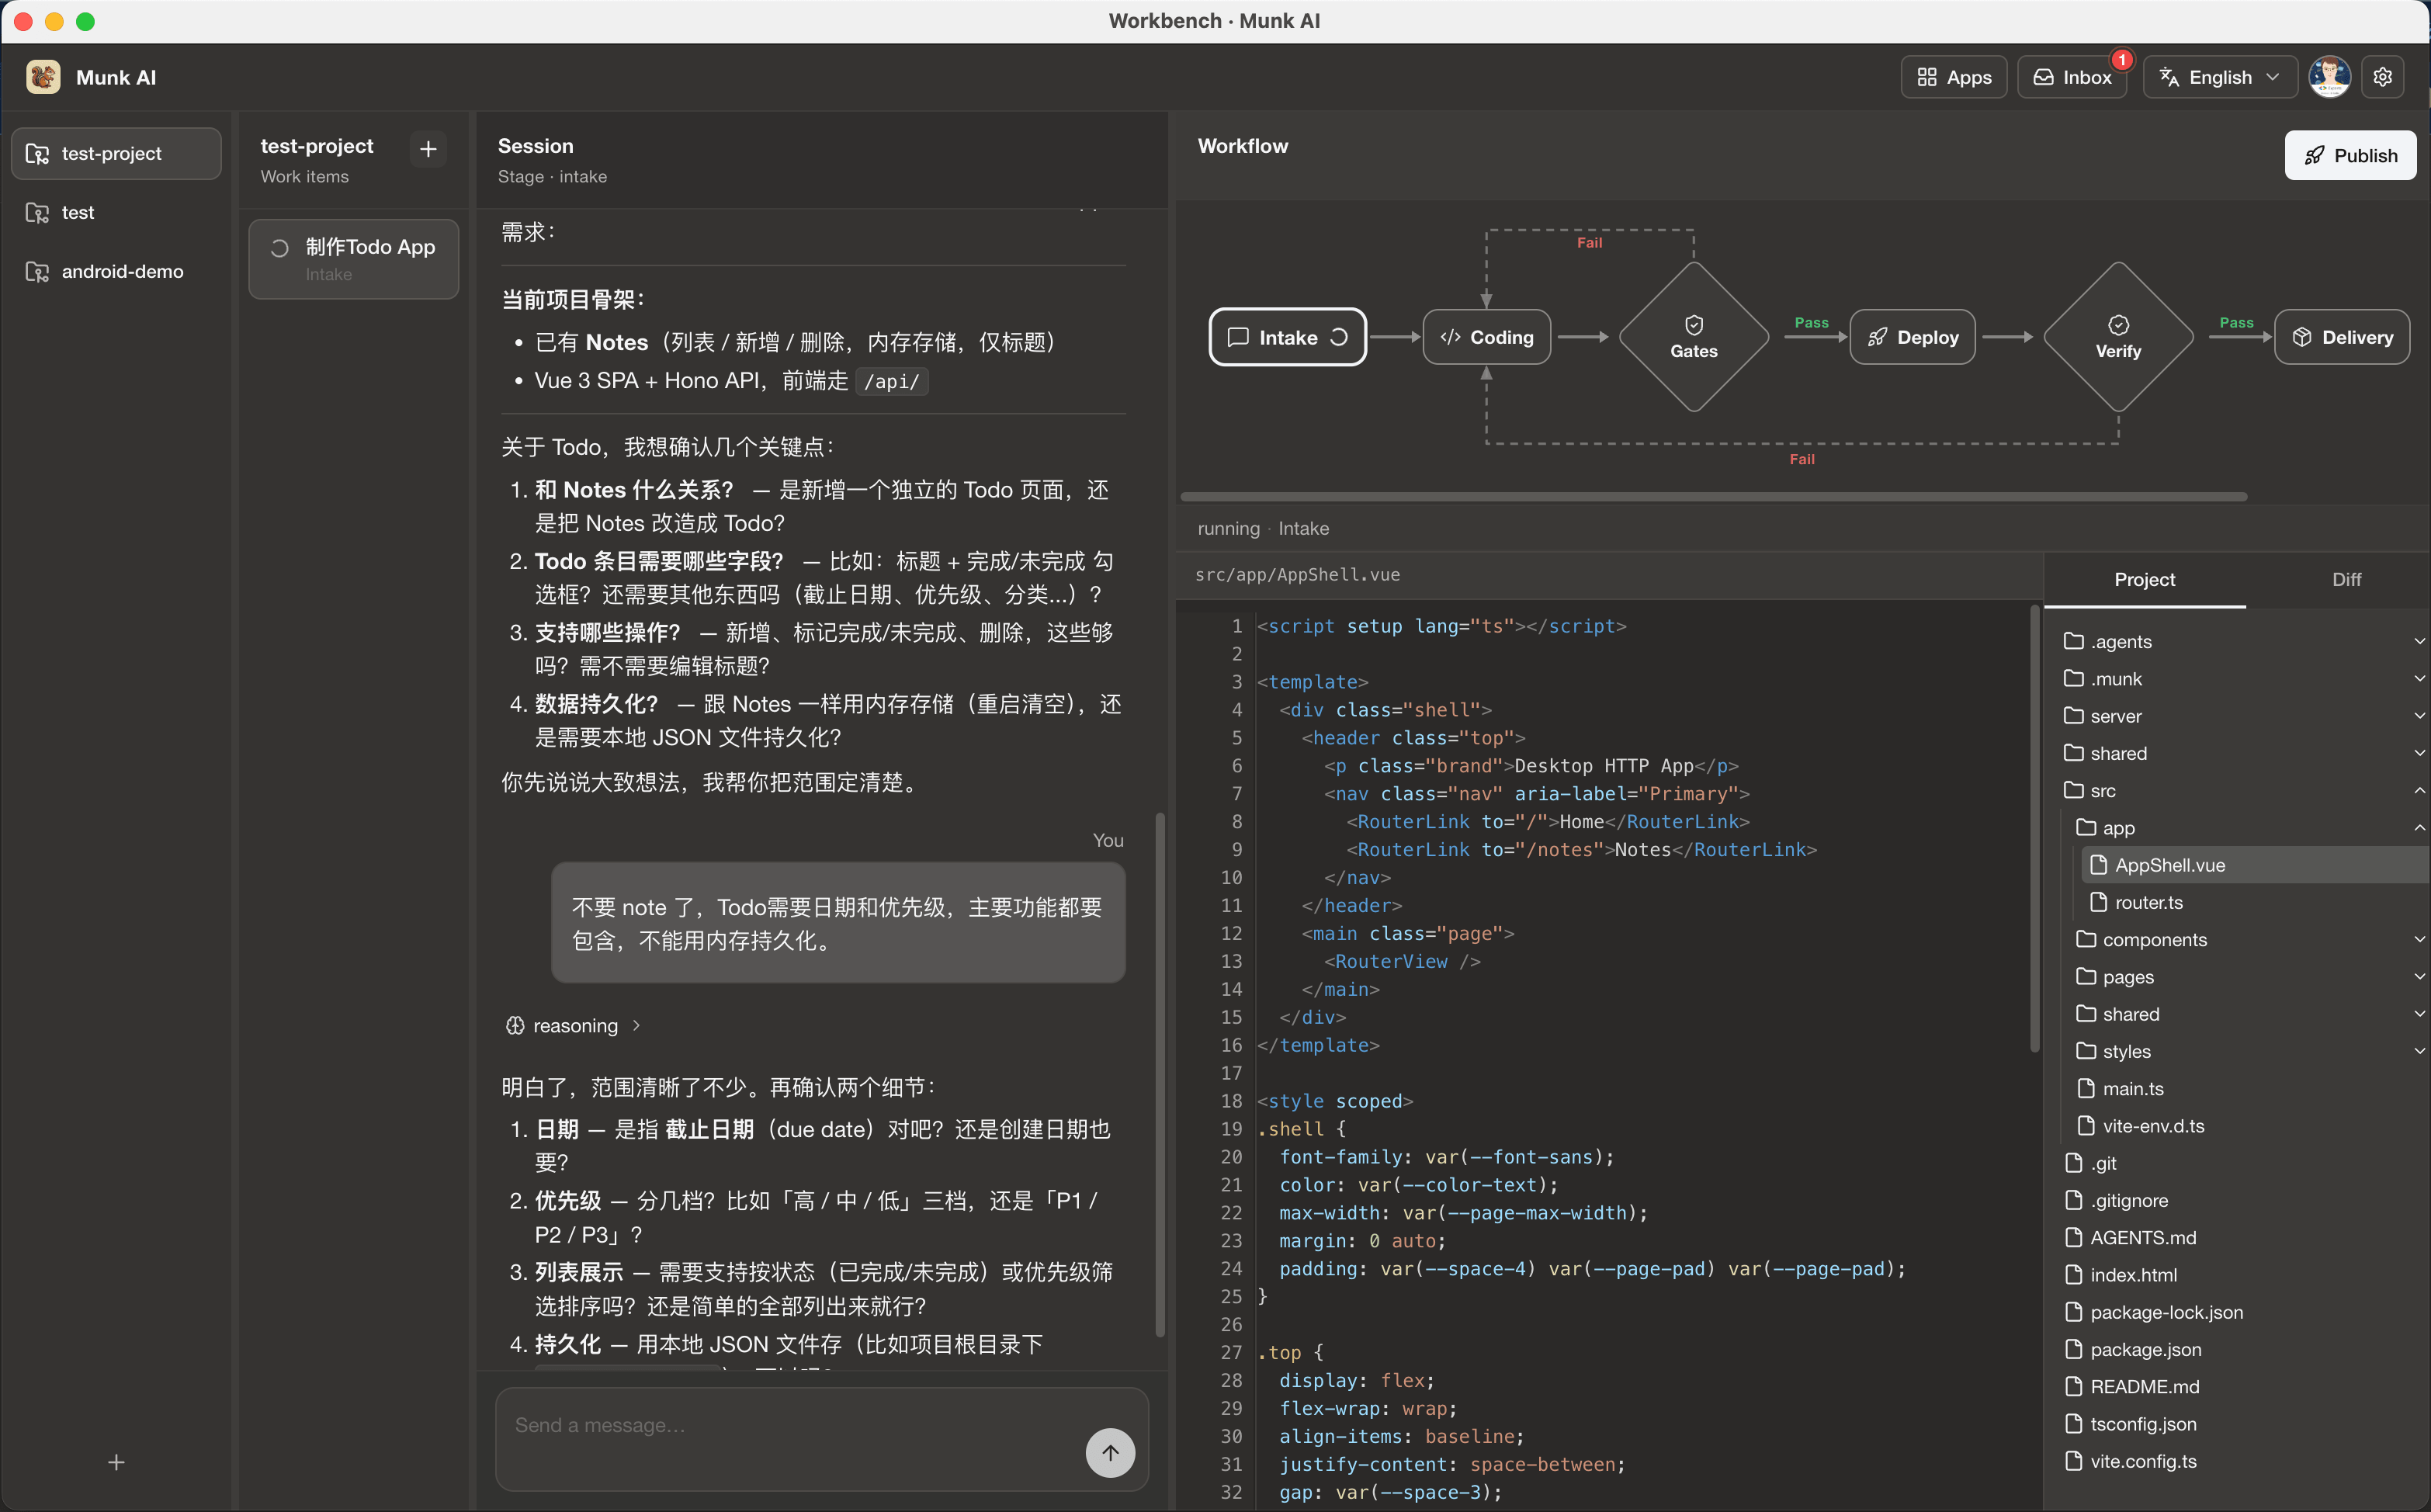
Read it by region:
| Area | Role |
|---|---|
| Left project list | Switch local Codebases |
| Work items column | Units of work for this project (requirements / bugs / Issues, and so on) |
| Center Session | Chat with the agent for the current stage; clarify goals, read reasoning, send messages |
| Top-right Workflow | Intake → Coding → Gates → Deploy → Verify → Delivery; failures can loop back to Coding |
| Bottom-right code / tree | Inspect related files; switch to Diff when needed |
Items that need a human decision show up in the top Inbox.
6. Minimum path: one work item end to end
- Create or open a project (any Home entry)
- Create a work item — think GitHub Issue, product requirement, or bug; or wait for GitHub / Feishu / DingTalk intake
- In Session, make the goal clear (the agent may ask follow-ups; answer and let it continue)
- Watch Workflow advance; on Gates / Verify failure it re-enters repair under Host rules
- When you must decide, open Inbox and act
You do not need MCP, Skills, webhooks, or UI Verify for the first pass. Success is: project → work item → chat → follow the flow.
7. Optional: follow progress away from the desk
Keep the desktop signed in and disable system sleep (screen off / lock are fine). Then use the website Remote UI to check progress and chat with agents. See Remote UI.